The Solar Bike Trailer
Link to the YouTube series: https://www.youtube.com/watch?v=jYcOVq62N50&list=PLwGrHEqASn27YINRIL0njr4_XnYqxUbm2
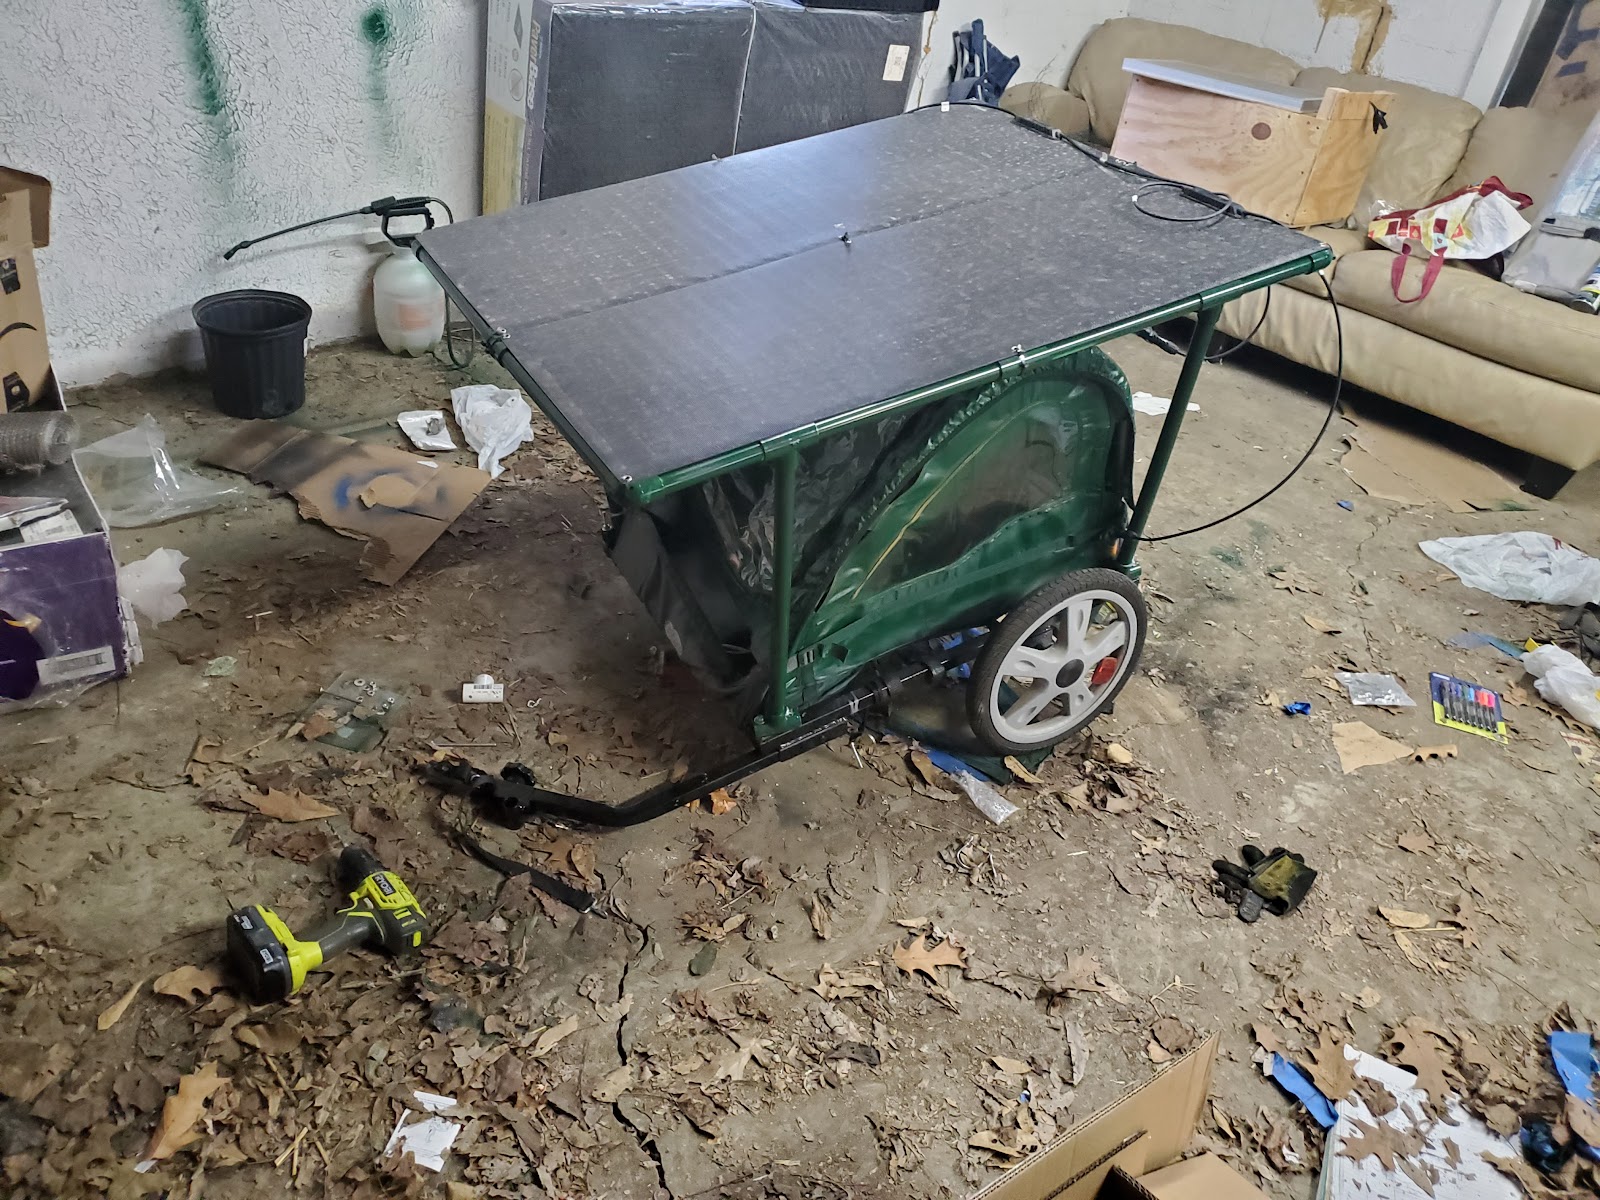
The 50 watt solar bike milkcrate is a solid option. But it’s still not that much power input, a cloudy day and lack of storage means that the step up MPPT charge controller method gives you little options. For this project I’ll be using a cheap bike trailer I scored on Craigslist for about 30-40 dollars and trying to convert it into a solar charging station with upwards of 200 watts of solar output.
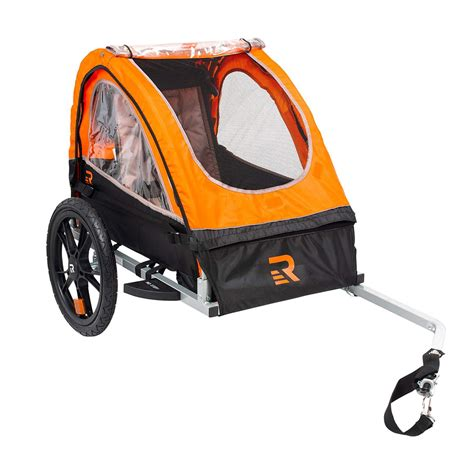
Above, not the same trailer I used but looks nearly identical.
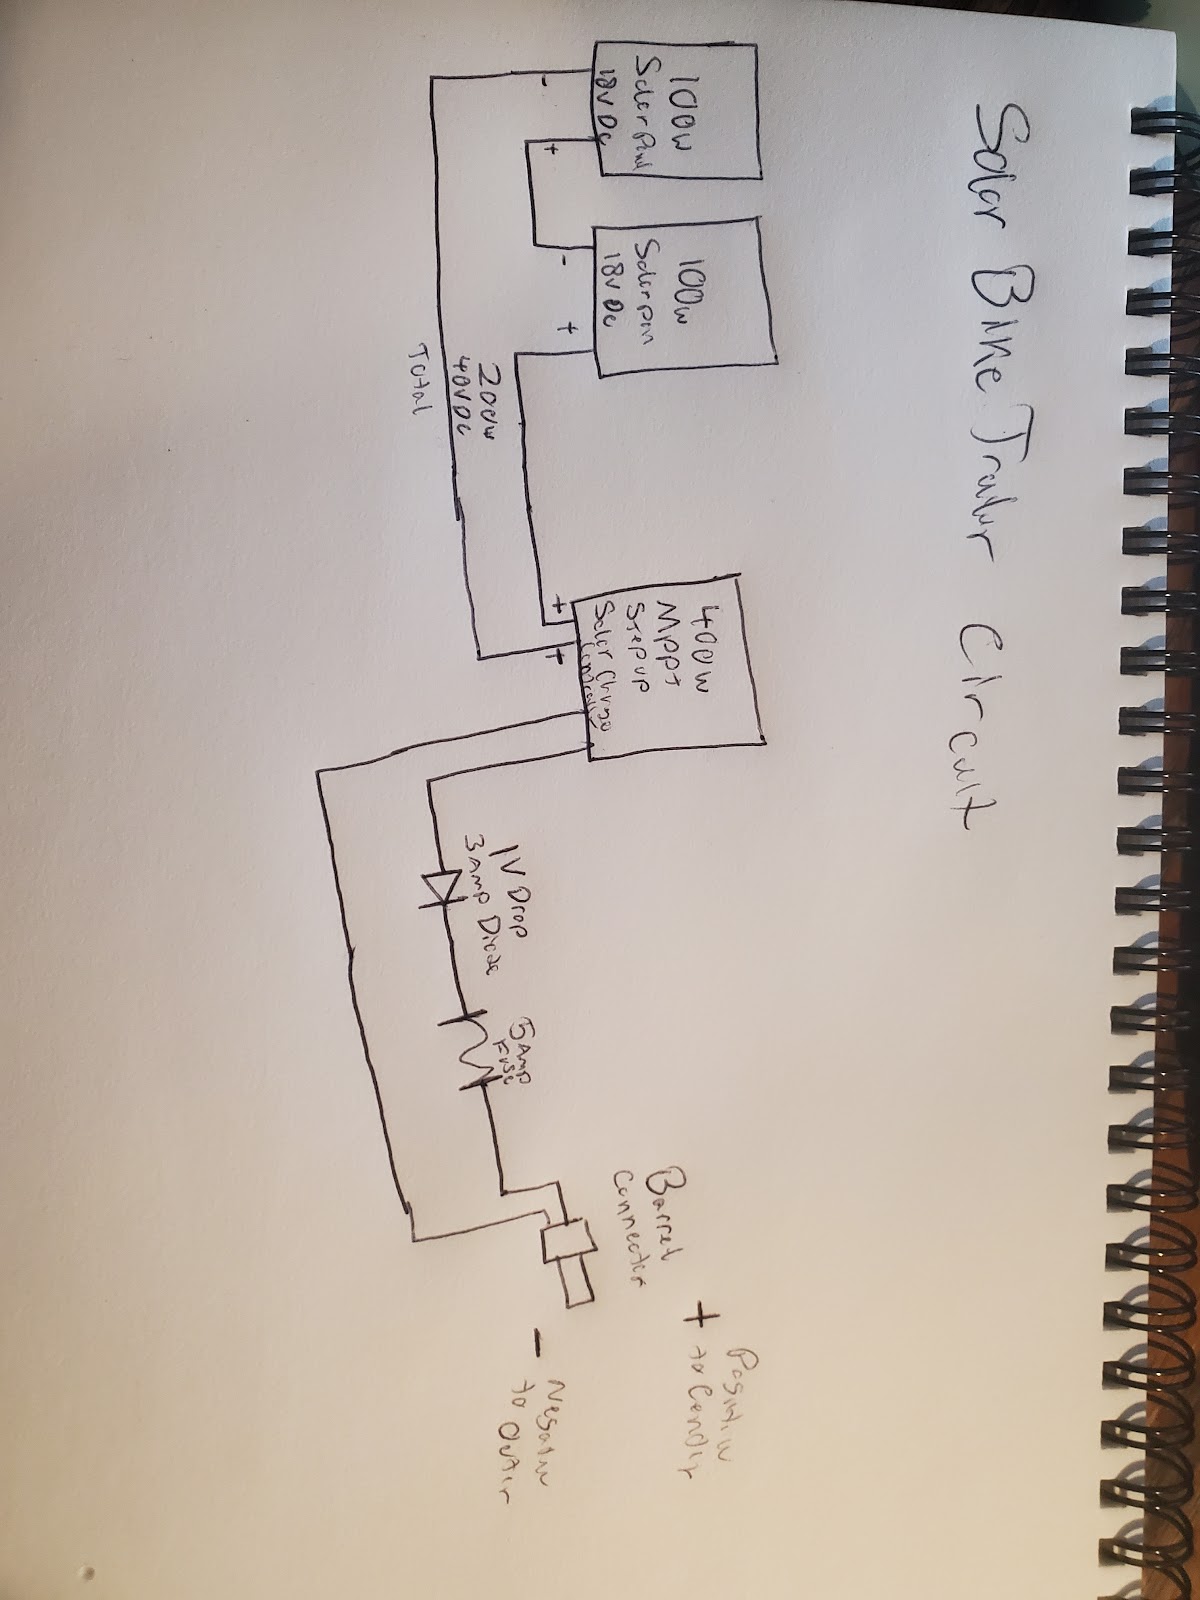
Above, rough sketch of Possible Solar Bike Trailer Circuit.
If I were to do this project with the same method as the 50w milkcrate, this is likely what I would do. To ensure that only 3 amps of current would go into the bike battery at a time, a simple 3 amp current limiting diode would be added to the circuit from the charge controller to the bike’s battery. I would likely have used something similar to a 1N5400 series diode. After that the adjustable mppt charge controller would just have to be set for whatever the voltage drop is. For example if the voltage drop was 1.2v (often listed as Vf), then I would have adjusted the voltage output to go from 54.6v to 55.8, then when the voltage drops. Giving me 54.6 by the time the current exits the diode. As with the previous setup, feel free to lower the output voltage slightly on this setup, if paranoid about exceeding the bike battery's maximum voltage.
However we’re going to use a different method this time, so the above image is just me pondering.
The goal of this project is to have a much higher amount of power input at least 100 to 200 watts of solar input, as well as storing at least some of that energy in a battery. I also toyed around with the idea of powering small appliances with this system. Because of all of this, I decided the best way to go forward was to either buy a solar generator, Or to build a very small DIY solar rig (say one that could fit in a milk crate entirely). After thinking back and forth around what I needed for this project, I figured I would try to use a solar generator both so it would be more waterproof, and because I wanted to use a large Solar generator in an emergency to power my car in small amounts.
Building the Frame.
Ok when planning this project out, my advice is to get some solar panels first and then build the entire structure around the solar panels. In my case I planned to grab a few highly rated panels. This is not what happened with me as I found a few discount ones for around 100 dollars during a sale that happened to look like they would work well. I was incredibly lucky that they did.
When finding solar panels for this project here’s what I recommend looking for
Flexible
Lightweight (reduce jank)
Long not wide (or square)
Easy to mount
Well reviewed
What I ordered were x2 Topsolar 100w panels. Each panel was 46 inches by 18 inches wide. Meaning I figured I could lay these out side by side and get my trailer to be 36 inches across at its widest point. I figured that 36 inches wide would be reasonable to ride behind me and still let me pass through obstacles designed to let bikes through but to keep out cars. Luckily I have not had any issues with this so far. The solar panels were also flexible and lightweight which would be good to reduce jank. The final good bit of news was that these panels had grommets on them, meaning I could use either builder’s wire or zip ties to mount these to the frame.
When building the frame, I debated on using either lightweight 2x2 boards, aluminum, or PVC. The more I thought about it, the more PVC was the way to go. PVC is easy to work with, lightweight, flexible, cheap, easy to prototype with, I have the tools to work with it, already had some lying around, and was easily paintable. I figure if need be, I can make some of these out of aluminum after I have the prototype built and if someone asks for another. So to make a long story short I used 1 inch non threaded PVC since that gave a good middle ground between weight and strength for what I was doing. If using heavier panels go with wider PVC.
Anyway to test that this would go fine I went ahead and built a frame to simply hold the panels and make sure the pvc could take the weight. Each piece of PVC Joint has around 1 inch of sleeving meant to go over the pipe so keep that in mind when planning this out with 1 inch PVC. This meant my solar panel frame of 46 inches by 36 inches of material came out to 48 inches x 38 inches (build it slightly bigger than you need to drill out the mounting point in the center of the pipe and not the edges)
Pipe sections for top pieces
X6 16.5 inch pieces of 1 inch wide PVC
X6 21.5 inch pieces of 1 inch wide PVC ( 4 of these piece will later be cut down)
X4 90 degree elbows of 1 inch wide PVC
X4 Tee junctions (will later need another 8) of 1 inch wide PVC
X1 Cross fitting of 1 inch wide PVC
Later on in the project another x4 sections of 23 inch PVC will be needed as well.
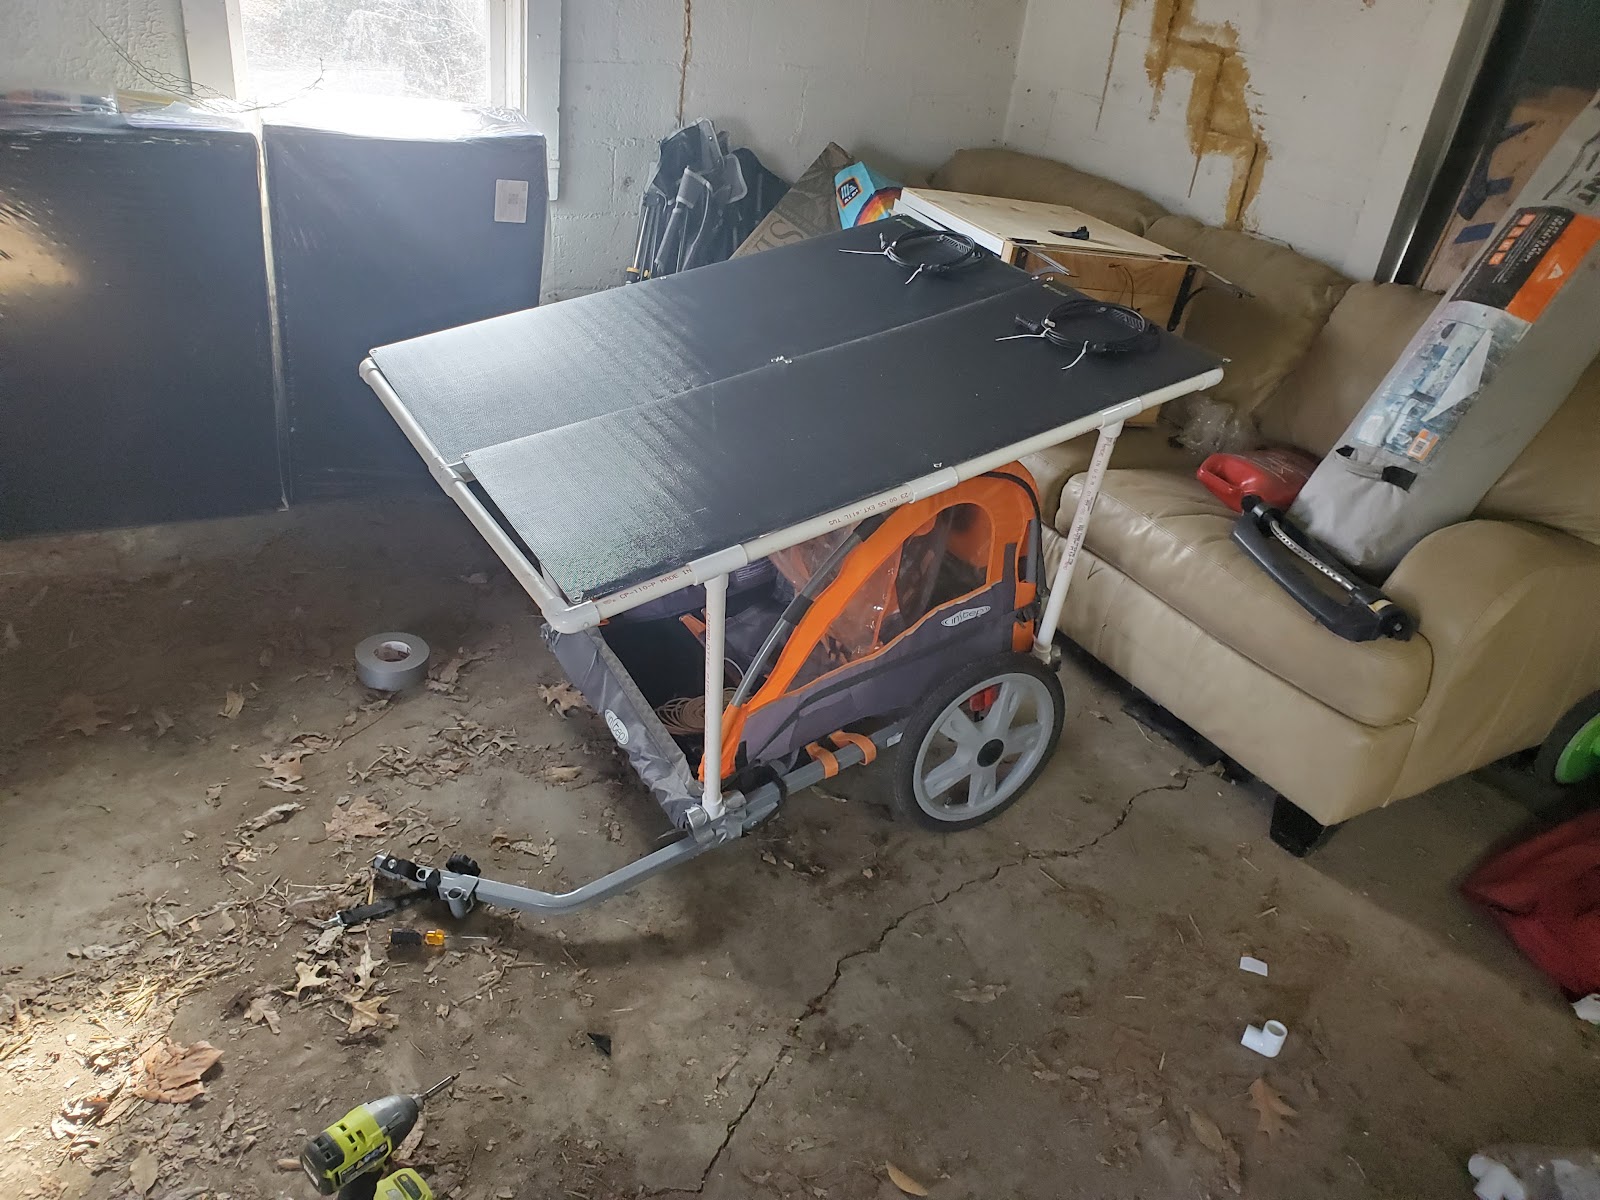
Once all these pieces have been cut out, snap them together (do not PVC cement yet) into the pattern as seen below and confirm everything looks good. Then go ahead and lay the panels on top of the frame and just be sure that they fit correctly and everything lines up. At this time I would also recommend drilling the holes in the pvc for where the mounting holes of the panel are going to be. Adding the mounting holes can happen later, but it’s good to think about how all this will go together. Using a sharpie or marker to mark where the holes would go.
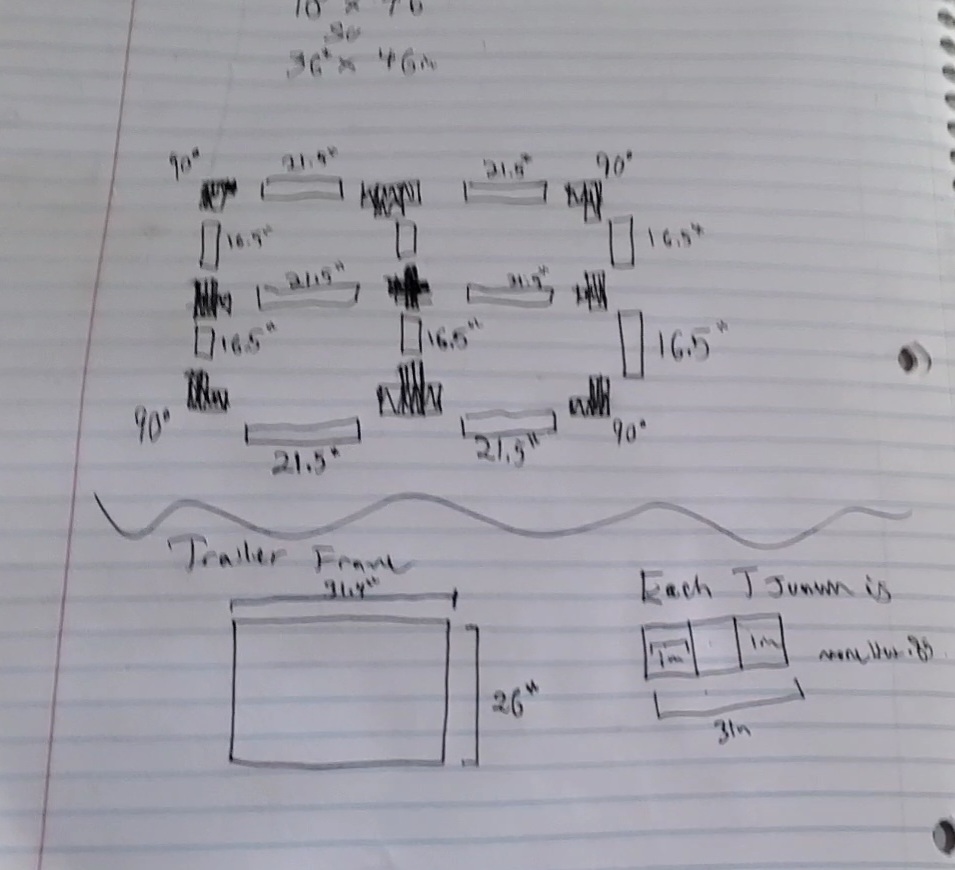
Above, rough sketch, I apologize this is the best picture I had.
Once confirmed that the first frame will handle the solar panels well, it’s time to figure out how to mount the top frame to the bike trailer. This is one area where if you’re building your own bike trailer, you’d be in a much better position than someone trying to make do with whatever is lying around. Since I’m using the odd little kid carrier off craig’s list my only decent option seemed to be to add T joints to where the corners of the bike frame are, then to drill through them into the bike frame trailer. After that I’d add a 4 inch long nut and bolt assembly to keep the whole thing together, once the project is 100% finished and together, it may be wise to add temporary loctite to these bolts.
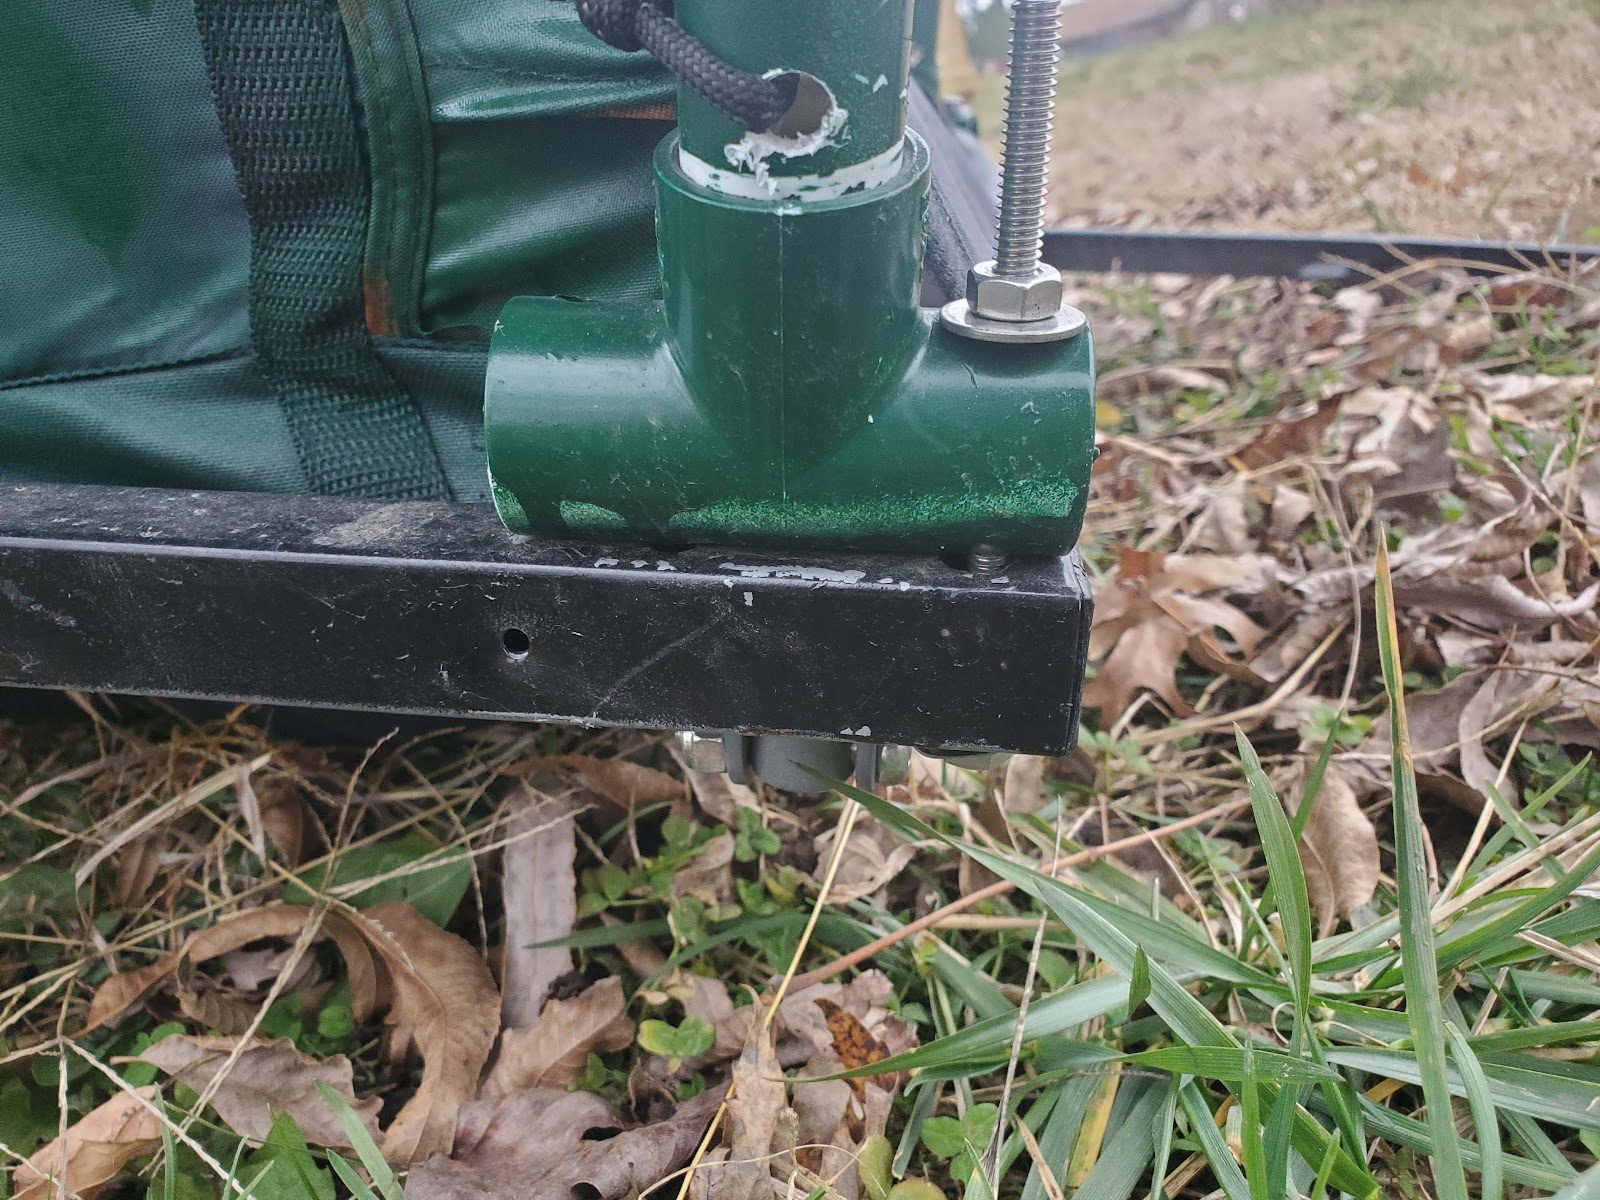
Above, See the bolt holding the Tee junction onto the bike frame.
After this measure the difference between the two posts on the left and right side. Triple check this. In my case these wound up being about 29.5 inches apart. Then go ahead and cut sections in the x4 sections of 21.5 inch sections of pipe as seen in the mainframe sketch above.
Using the
X8 remaining Tee junctions of 1 inch wide PVC
X4 23 inch pieces of 1 inch wide PVC
Then just snap everything back together and place it on top of the trailer to ensure everything fits and there are no issues with placement. You can temporarily tape the bottommost T junctions to the bike trailer here. If everything looks good, then you can go on to then disassemble the structure and to go ahead and PVC cement the entire thing together. Although I personally recommend not PVC cementing the PVC joints of the last x8 Tee junctions added. This is simply to make it easier to fold up and take the legs off if needing to fold the structure for storage or fit into a car. But do what you want to do.
Above, making sure everything fits together nicely before PVC cementing things in place.
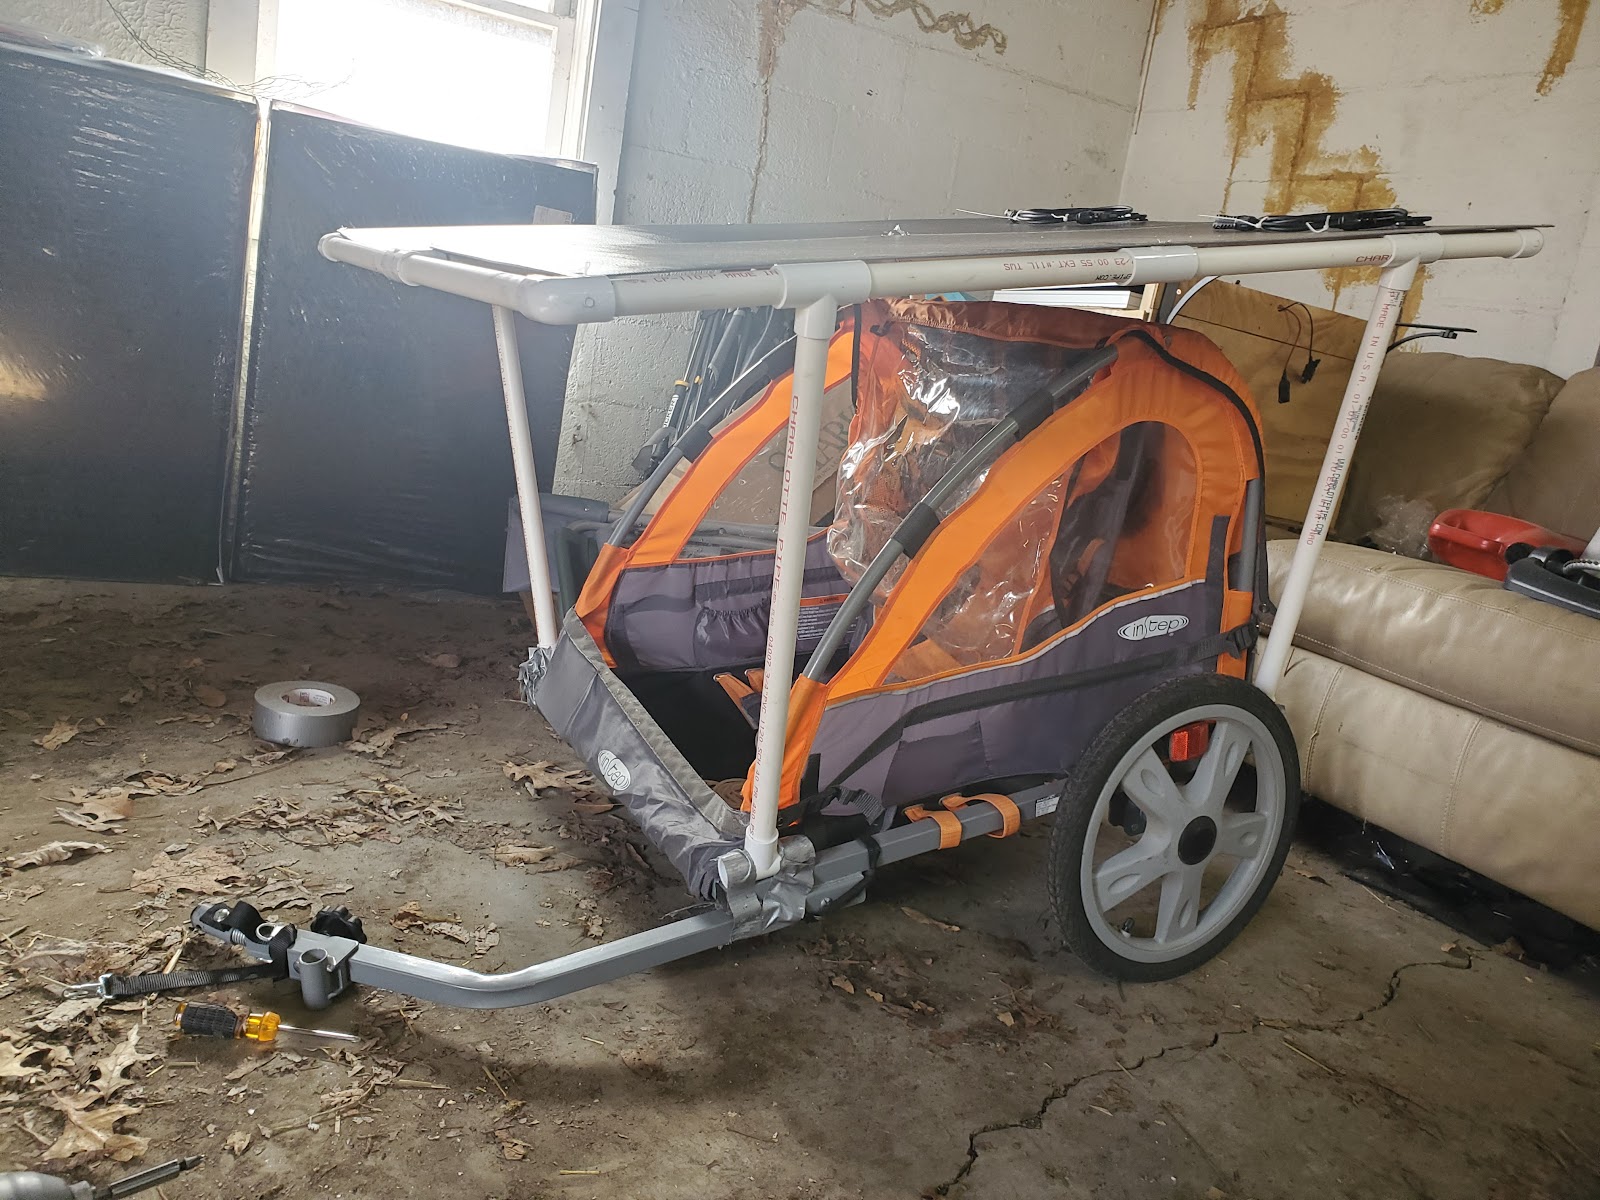
Above, making sure everything fits together nicely before PVC cementing things in place.
At this time I also recommend doing two more things, the first is to drill holes in the legs to add material to cross brace the PVC and keep it from jerking around when starting and stopping. It looks good, and I wish I had thought to do it in this section. I wound up using some old black paracord I had lying around since it’s fairly sturdy and looked good with the green color scheme.
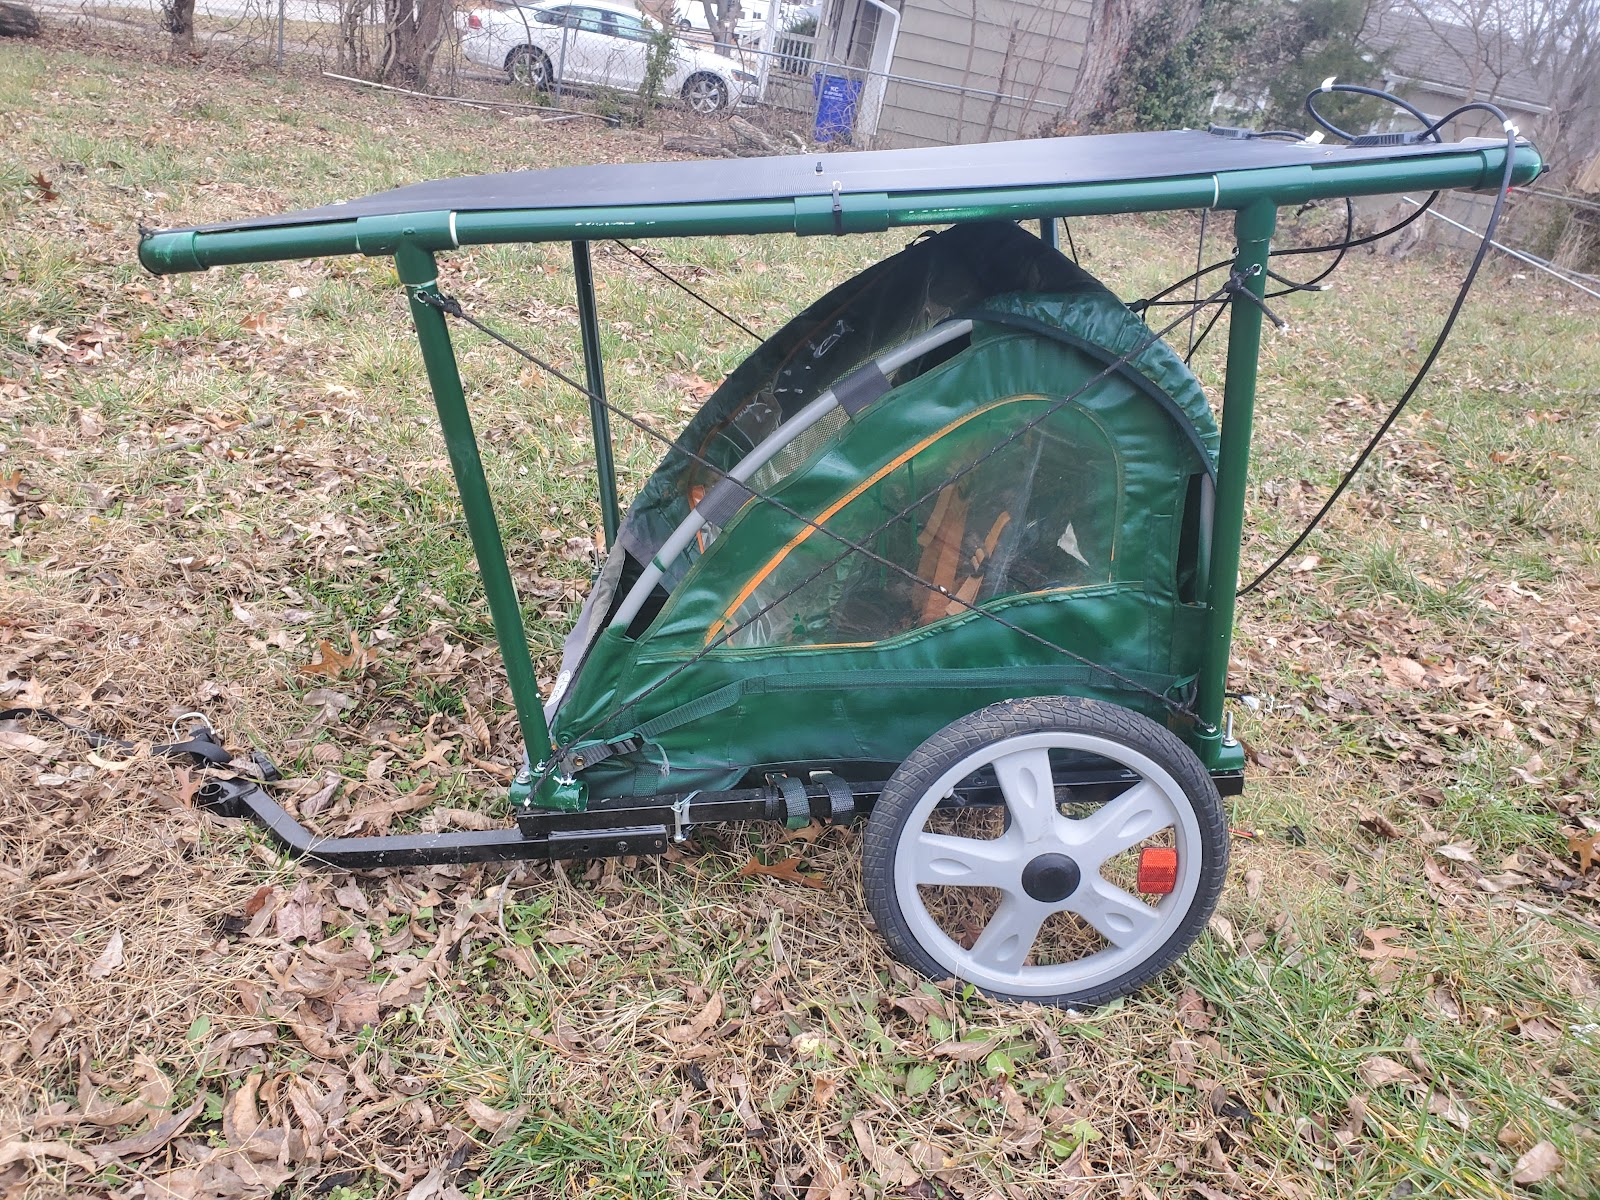
Above, see the black paracord used as cross bracing material on the legs of the bike trailer.
The other thing I recommend doing at this time is painting everything. You may have noticed from the images I’ve been using that in some the bike trailer is orange with unpainted PVC and in others appears to have an entirely green and black paint scheme. This is because I put out a poll on tumblr on whether to keep the orange paint scheme and give it a construction worker vibe. Or to paint it forest green and let it blend in with nature type of look. Forest green won over construction orange by a few votes, so I went ahead and painted it. Took me a while and it’s far from my best work, but by the end of the project it honestly looked fairly good in my opinion.

Above, Painting the PVC Frame.
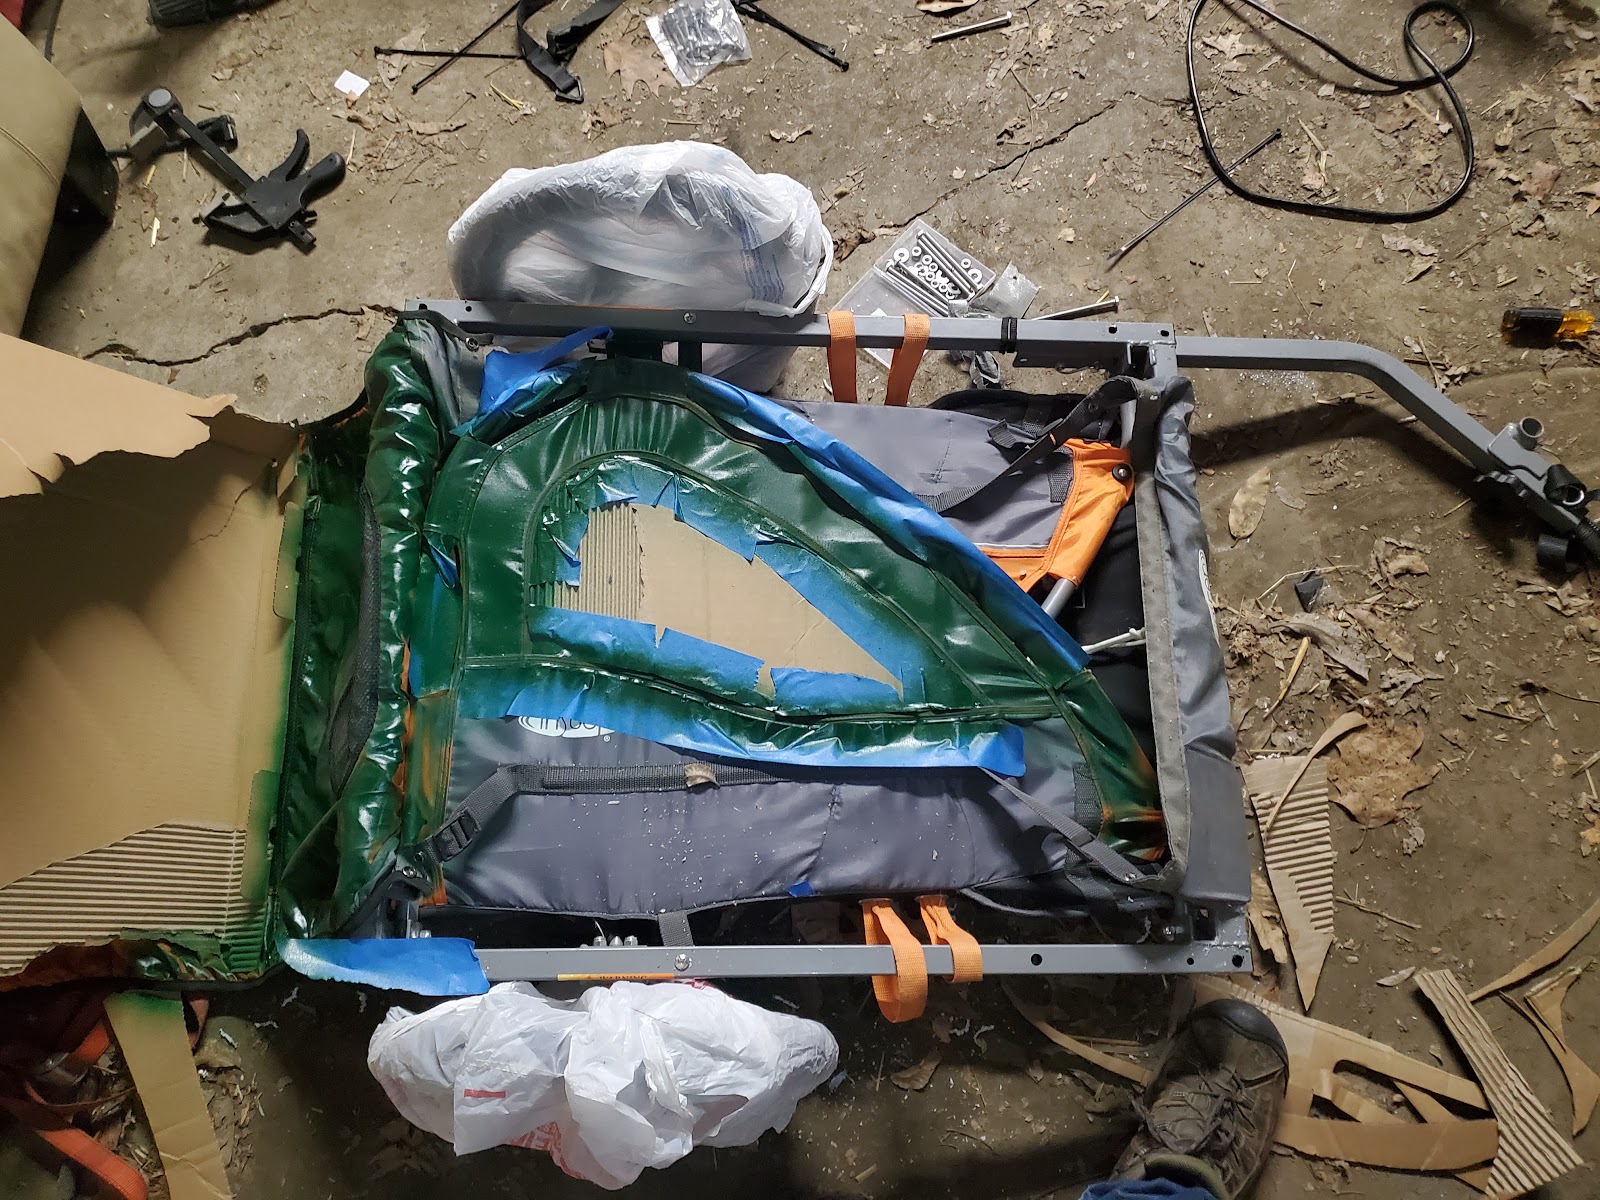
Above, painting the bike trailer.
Above, completed paint job.
The last thing to do after painting is to attach the panels to the frame. I wound up using some black zip ties that I had lying around. Once the panels are perfectly lined up how you want them. Drill holes into the frame if not done so already, I recommend marking where the grommets are on the frame by getting a sharpie and coloring the insides of the grommets. Then with the panels off, drill a hole that exact size and zip tie the panels in place.
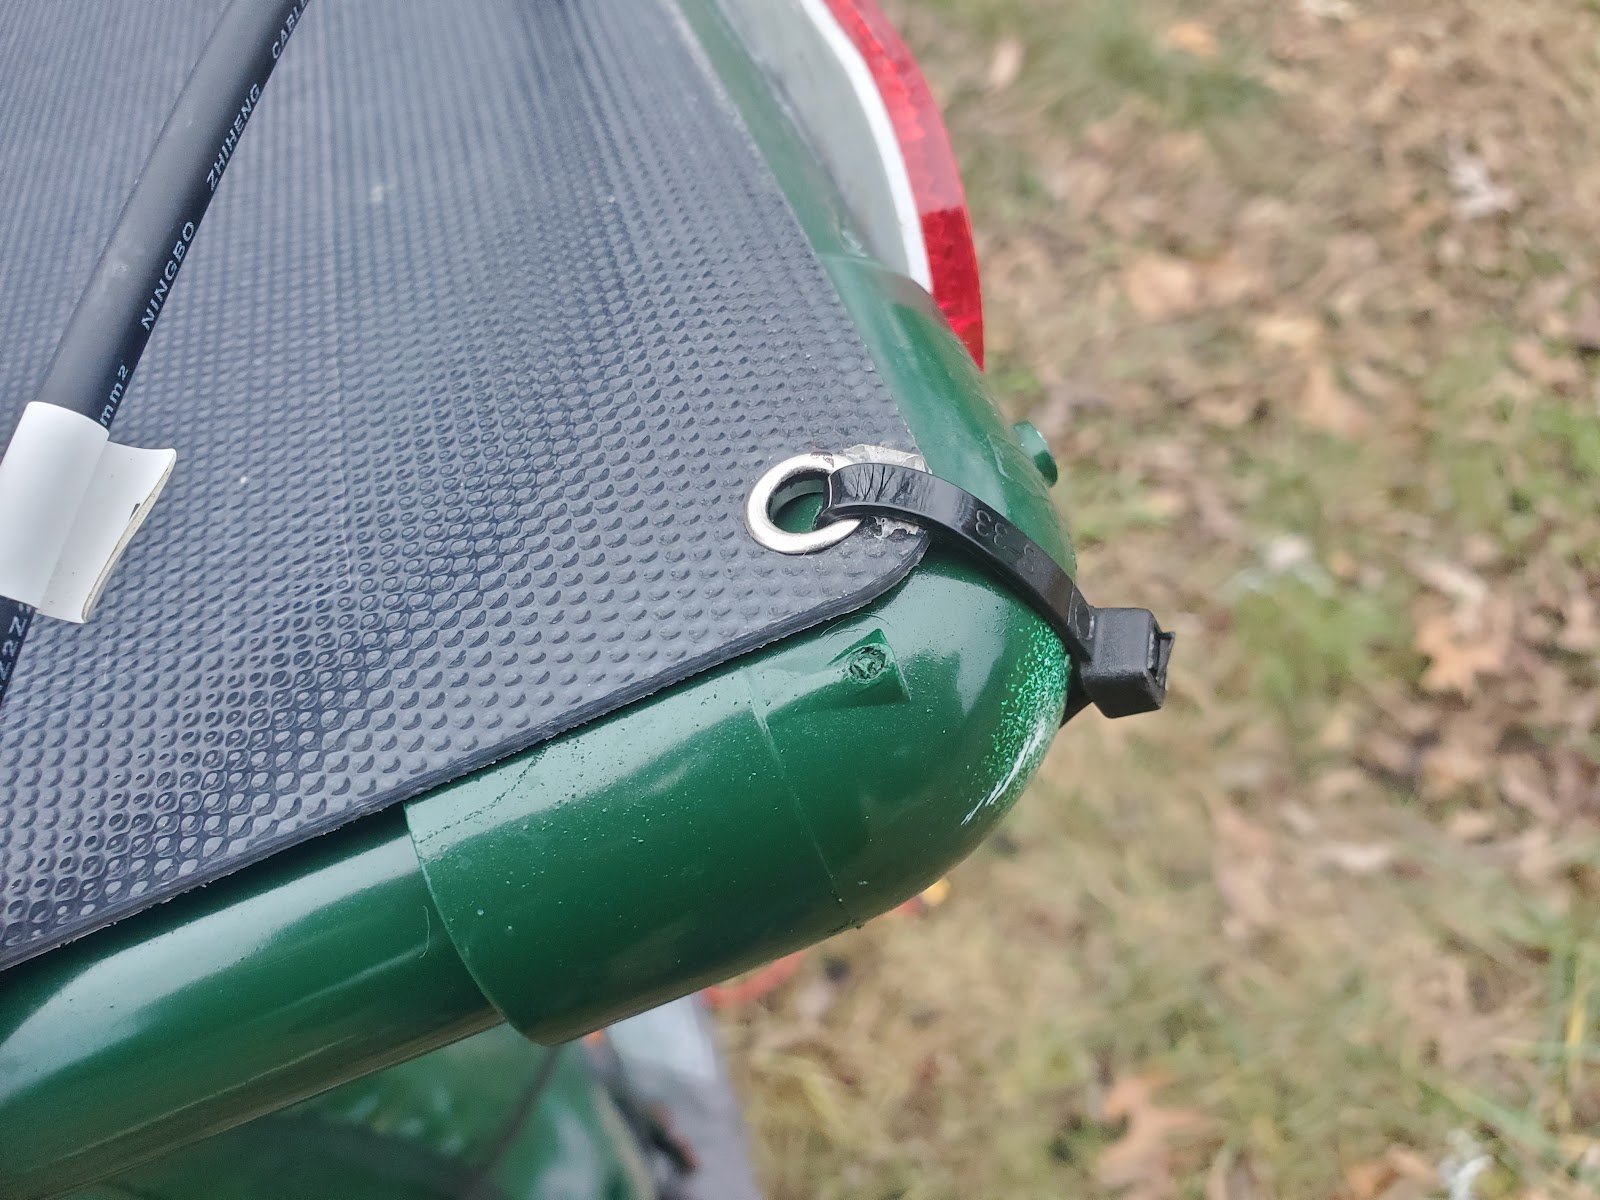
Above, ziptied panel to PVC frame.
Adding the Solar Generator
Once that’s done the only thing left to do is to find a solar generator that will work for what I’m trying to do.
There are three things to think about when picking one of these out.
Solar input
AC output
Battery Storage
For solar input, we’ve installed 200 watts of solar panels so we’ll need at least 200 watts of solar input for our generator. Luckily we can easily have these panels set in either parallel or series giving us either around 32 volts output at around 6 amps, or 16 volts of output at around 12 amps. Sadly for the majority of Solar generators, solar input is the thing most neglected weirdly. In general I’ve found that only solar generators with 500 watt hours of storage or more usually have 200 watts of solar input. Because of this limiting factor, if on a budget it may be advisable to build a solar bike trailer with only 100 watts of solar panels above it, as this means a significantly cheaper solar generator can be used. In any case get ready to read through a lot of different solar generator manuals to find what you need.
For AC output we only need something that can power the bike’s battery charger. Our bike charger is listed as requiring 150 watts. So anything over 200 watts is fine. Though having the AC output can be useful if needing to charge anything else.
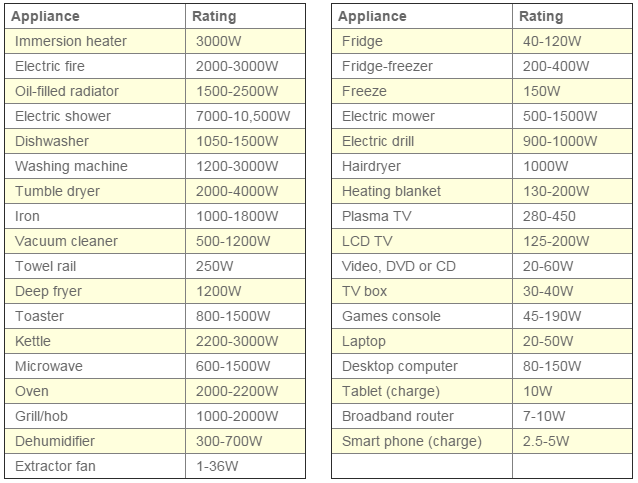
Above chart of wattage of different household appliances.
For Battery storage, it’s not the most useful thing in the world for the simple reason, you can always get another bike battery and store excess power in there. Still it can be handy to have. Our bike battery takes 150 watts over 5 hours to charge up our bike battery so it needs around 750 watt hours or 0.75 kilowatt hours of storage per complete charge. The main benefit to having more storage in our case is that if the bike has been working all day, having more battery storage means that during the night, the solar generator can use its stored watt hours to recharge the bike battery over 5 hours with no need of help from the sun.
The completely overkill solution I went with, and how I’m justifying it.
Ok I wound up buying an Anker Solix C800. I wound up buying it on sale for around 400 dollars. The Anker Solix 800 has up to 300 watts of solar input and can handle 11-60 volts with a max of 10 amps (yes I know that means it should be able to handle 600 watts of solar max, that’s not the point.) It can also output 1200 watts of AC power at max, which is x6 what I need for the bike but we’ll get to that. And it has almost 800 watt hours of battery storage (hence the name) which is enough to completely fill up one of the KBO ranger’s bike batteries (for less than the price of a new KBO battery weirdly).
So the question becomes why on earth did I go overkill with this tool. And the answer is because the 1200 watts of AC output lets me power another vehicle in an emergency. And that’s my car. My car is an older electric vehicle, and on its lowest charger setting, it can be charged right below 1000 watts. That means that in the event of an emergency, I can use this bike trailer and solar generator to charge my car a small amount, which is pretty good for something I can fold up and throw in the back seat. Additionally if need be I can power nearly every tool I own off of this device. Meaning I could power other people's bikes, power tools, a fridge (useful if you know a diabetic person), an AC unit, a small heater, or even a microwave. This thing has so many utilities, that’s it’s honestly kinda silly. If I need to power a whole campsite, or if I’m rehabbing a house without power, this thing can make that a possibility. So to summarize, yes the Anker Solix C800 is completely overkill for this project, but it isn’t overkill for all my other projects.
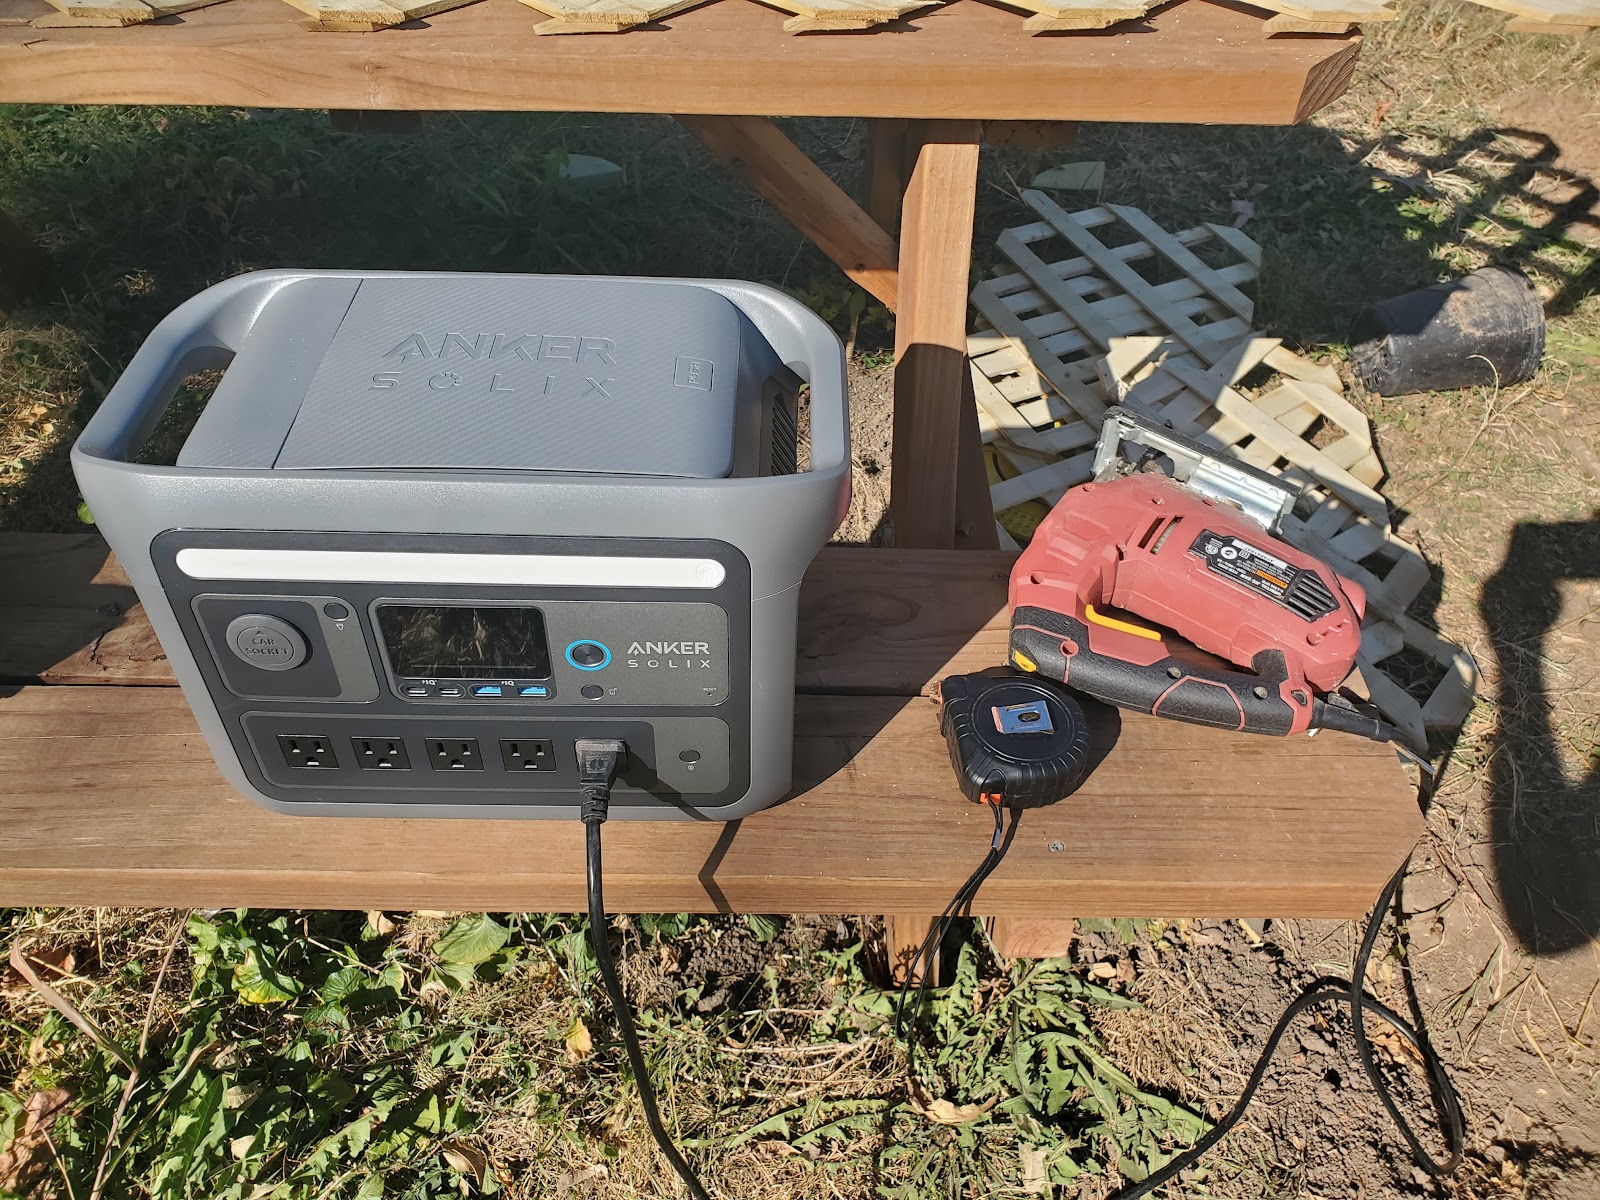
Above, Anker Solix C800 powering some power tools unrelated to the bike project.
Anyway to make a long story short. Hook up the bike trailer’s panels to the solar generator. Then hookup the bike’s charger and battery to the solar charger. Toss the whole mess in the back, these trailers usually can handle 40-80 pounds of children, the solar generator and an extra battery should only weigh around thirty pounds so no worries. After that the last thing I recommend adding are some stick on bike reflectors if you’ll be taking this down roads with cars.
Congrats you're done. You have now built a bike trailer that can charge your bicycle as well as many more things you could need.
Now to test this thing out, first opportunity I’m going to drive it across the state of missouri and see how it handles.Will report back once I have.
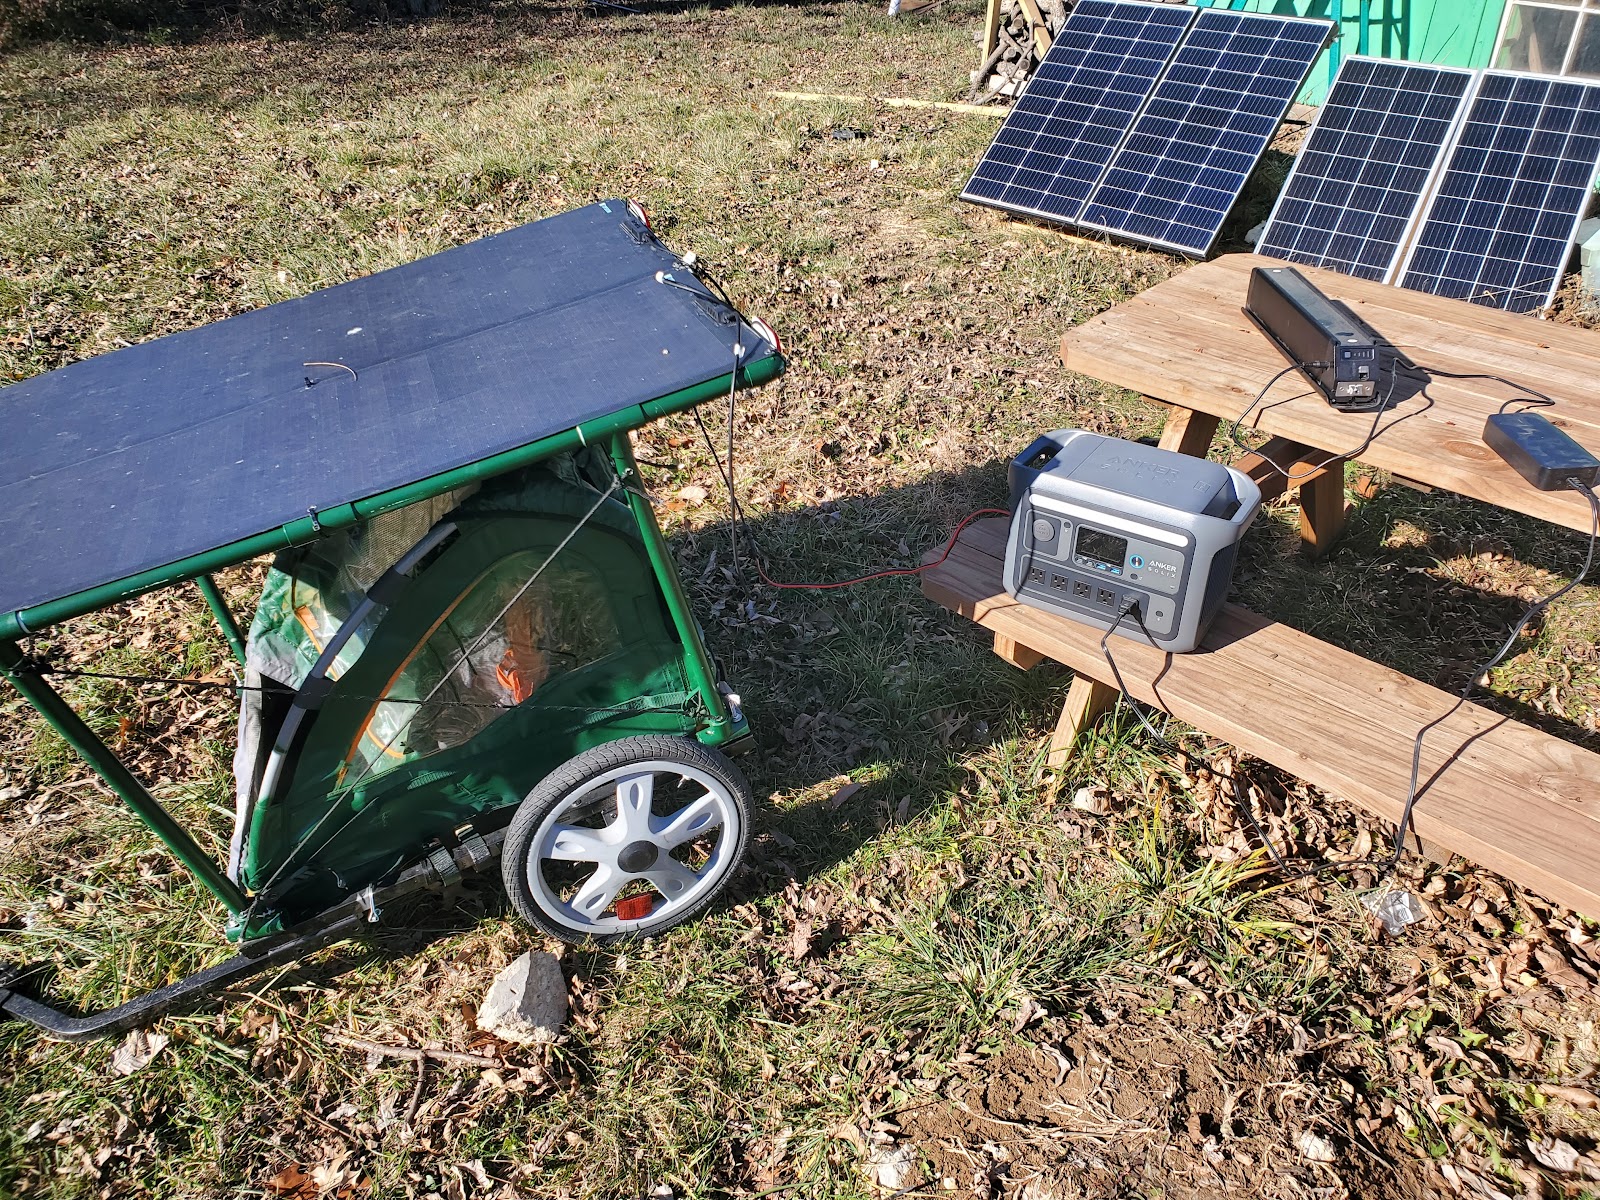
Above, the solar trailer feeding the solar generator feeding the bike battery.

Above, a mostly completed bike trailer hooked to a previously built solar bike.
Parts List
X2 Flexible 100 watt solar panels or a large 200w panel.
X1 Bike trailer
X1 solar generator capable of 200 watts of solar input.
X6 16.5 inch pieces of 1 inch wide PVC
X6 21.5 inch pieces of 1 inch wide PVC ( 4 of these piece will later be cut down)
X4 90 degree elbows of 1 inch wide PVC
X12 Tee junctions of 1 inch wide PVC
X1 Cross fitting of 1 inch wide PVC
X4 23 inch pieces of 1 inch wide PVC
X1 PVC Cement Kit.
X1 Bag of Zip ties
X1 Kit of 4 inch long ¼ wide nuts and bolts kit.
X 10 Ft of paracord or equivalent
Assorted spray paint (if desired)
X2 Bike reflectors
Please note all the PVC 1 inch pipe in the project adds up to 320 inches. PVC pipe is often sold in 10ft segments so it may be advisable to buy three ten foot segments if buying everything at once.
Tools
X1 Hack saw for PVC
X1 High powered electric drill with assorted bits

