Sunday, September 10, 2023

Big Stupid Homesteading Cookbook: Black Walnuts, collecting, processing, and eating.


Black Walnuts


I live in Missouri at the time of writing this, so I’m practically covered in these. Honestly every third house in Kansas City seems like it has a black walnut tree. Black walnuts are high in protein and fats, the husks can be used for dying, inks, paint and herbicide, and she shells can be used for sandblasting or woodchip like paths.

Step 1: Husking.

First thing is getting that green/black coating off. They’ll seem hard as they first start falling off the tree, but as time goes on they’ll soften up. Problem is though, the longer those husks are on the nuts, the more bitter the nuts generally become. To judge the age of the nuts off the tree, they start nearly completely green then turn black the longer they’re off the tree. Anyway there’s a few methods of getting the husks off, though be sure to collect the husks as they have a few good uses. Note do not be alarmed if there are small bugs on/in the husks, we’ll test for the good nuts later. Also be sure to wear gloves and clothing you don’t care about, these husks will stain clothes a rich brown.

Husking Options

  • Sharp Knife. This one is pretty simple, take a small sharp knife, say a good pocket knife or a paring knife from the kitchen and cut off all the green/black gunk within reason.

  • Heavy Boot. This is good if the husks are starting to get slimy. Just squish as much of the hunk gunk off that you can a heavy boot.

  • Car. If you have a heavy amount of walnuts and a car is available, consider running them over. It might feel silly to have to move a two ton car just to crack open a nut, but it does work!

  • Professional Shelling Service. If you live in an area that has a heavy amount of nut trees, and you have an insane amount of nuts to shell (I’m talking a truckload.) Then it may be advisable to look into a professional shelling service. I’m including a link to Hammons Black Walnuts here.


Step 2: Cleaning and Drying.

This step is pretty simple, all the bits of remaining husk gunk on the nuts have to be removed. Just spray them with water and let them soak in a bucket overnight. If any nuts float to the surface, then that’s probably a bad nut. If you have a high powered nozzle or maybe a small pressure washer, now would be the time to use it. Just let the nuts soak overnight or for most of a day.  Then take the nuts out to dry in a warm spot for the next 3 weeks to 3 months, or until when the nut is shaken you can hear the nutmeat rattling around inside. Leave these to dry somewhere like a sunroom or greenhouse that’s warm and squirrels will have difficulty stealing your nuts.

Step 2.5 Dyeing with Herbicide (optional). Know all those leftover husks and husk goop that came off the walnuts, you can reuse that in two ways. First off as you’ve probably discovered, black walnut husk stains skin/clothing a rich shade of brown. So if there’s anything you want to dye brown, leave cloth or yarn submerged into hunk goop until it’s the desired brown color. Many crafters also use black walnuts for making homemade ink or paints. After this the leftover husks and husk goop need to be disposed of and do not use black walnut husks as compost for anything. Black walnuts contain a herbicide called juglone which kills loads of plant types around them. For this reason do not let black walnut husks near any type of plant you're trying to grow. However if there’s a plant around you’re trying to get rid of such as invasive kudzu, these leftover husks can be great organic weed control.

Step 3: Cracking. Once the walnuts have been dried they can be cracked at any time. However it is likely wise to only crack open walnuts when they’re needed. Black walnut shells are fairly hard to get into but they also preserve the nut incredibly well, so being lazy and just leaving the nuts in the shells until needed will actually help out. For reference, nuts in the shell last around 6 months to a year at room temperature, while unshelled nuts seem to last around 3 months at room temperature. Keeping the nuts cool will help this, with refrigerated/frozen nuts nearly doubling their shelf life. Though if hard on fridge/freezer space, shelled nuts do fairly well in cool root cellars. Anyway cracking these black walnuts open is fairly hard work, but here are all the recommended methods. Please note, dry the nuts as much as possible, as the more these nuts are dried the more likely they are to crack open on their own.

  • Nutpick. Ok a nutpick is really just a tiny screwdriver/icepick like tool that is pretty good at getting into harder nuts like hickory or black walnuts. The trick here is just to let the nuts dry to the point where they seem to open up a little in the side. Then jam the nutpick in there and they practically split in two. 

  • Brick. Some people swear by just bashing the nut with a brick on a stone or concrete surface. It does work.

  • Hammer. Similar to the brick, I recommend going with a hammer with a wide head for this, like a smithing hammer if you have one lying around.

  • Fancy Nutcracker. When it comes to nutcrackers go big or go home, if it doesn’t look like a piece of industrial equipment I’d stay away from it. However if you have loads of hard to open nuts and the other options just won’t do it for you, go for an expensive nutcracker. Side note if a friend has loads of nut trees on their property, nutcrackers make a good gift for them.

Step 4: Cooking. Time to actually use the nutmeat. Additionally since these are rich in oil, consider tossing the nutmeat in an oil press if you need oil for any reason. Feel free to give the leftover shells to chickens to peck at as they love looking at leftover nutmeat. Leftover shells are also good for sandblasting, or due to their durable nature they can make a good footpath material.

Toasted Black Walnuts. To toast walnuts, just fry them on the stovetop on any random pan. No need to add oil as walnuts have plenty of oil inside of them. If you want to use an oven, toss them on a baking sheet one layer at a time and roast them at 350f for around 10 minutes or until golden brown. If using a dutch oven, over a fire/wood stove you're just going to have to eyeball it. If wanting to make a variation on this, to make candied toasted walnuts try adding a small amount honey, maple syrup, or other sweetener along with a pinch of a preferred spice such as cinnamon, allspice, dried hot pepper, or nutmeg along with a pinch of salt. Coat the walnuts in a thin layer of this concoction at a ratio of around 1 cup of walnuts, 3  tablespoons syrup, 1 teaspoon spice, and a pinch of salt. Feel free to experiment with this. Toasted black walnuts will last around 2 weeks at

Walnut Butter. Walnut butter is easy, use any walnuts that are raw, soaked toasted, or even honey toasted for a sweet butter. All you have to do is toss walnuts into a good blender or food processor and let them blend for 3-4 minutes or until rich and creamy. If you want to add sweeteners, consider sugar/honey/maple syrup at a ratio of about ½ tablespoon for every cup of walnuts. Fresh homemade walnut butter will last for around 2 weeks in a cool pantry or a month in the fridge.

Walnut Milk. Milk has loads of protein and fat, walnuts have loads of protein and fat, walnut milk can actually be a decent substitute for the real thing. To make walnut milk, begin by taking walnuts and soaking them overnight. You can skip this step if you desire but it’s highly recommended. After that, take the soaked walnuts and rinse them off, discarding the old water. Then add soaked walnuts to a blender, for every 1 cup of soaked walnuts, add about 2 cups of water. This will yield a single 24 ounce unit of milk or around a 0.75 liter bottle’s worth. Anyway, blend this 1 to 2 ratio of walnuts and water together for a minute or two and strain the mixture into whatever milk jug is available. To wring out the last bit of nut milk use a cheesecloth, coffee filter or nut milk bag to squeeze out the last bit of fluid from the nuts. As usual feel free to add a teaspoon or two of sweetener, or even consider adding chocolate to taste for chocolate walnut milk.


Because I love giving myself projects I have no time for, this might turn into the first part of my big stupid homesteading cookbook I've talked about. Link is here if anyone wants to take a look at things and offer suggestions.

Saturday, June 17, 2023

Survival 2001, By Henry E. Voegeli and John J. Tarrant.

 Hey All,

    Found a Solarpunk Book in the back of a weird antique shop in Herman Mo. I can't find any copies of it online or anyone who's ever heard of it, so I'm uploading it for the world to see. If the original authors ask me to take it down, that's fine but I ask that you make some version of it available to the masses. Even if it's just an ebook link through amazon.

Here's the Link.

    This book is full of designs for building a world that's more sustainable, and notably living with less oil. While I don't think every idea in this book is doable, or thought out (damming the bearing straight) there are so many interesting ideas I've found inside it that it seems like a crime not to let anyone see it.


Here's the Introduction by the way.

    By the late 1970s it seemed to many people that the earth was dying; or at least that part that had been favored by fortune- the United States of America.

    As we look back from the vantage point of the first decade of the twenty first century, it's not easy for us to realize this. It is particularly difficult for young people. They have read and heard the reminiscences; but these seem almost as wildly exaggerated as the tales of senseless wars like the 30-year Indochina conflict, the "limited" struggles along the USSR-China frontier in the 1980s or the "lightning incursion" that took place in central Europe in 1992.

    It is hard for us to understand the way it was then- the way the way people thought and acted, the motivation that gave rise to actions that now seem incredible to us. Nethertheless, it is true that many people thought that the earth was dying then, choking on it's own affluence and it's own effluents. And there was considerable basis for those fears. What was then called the 'ecology' - a term describing the relationship between water, air, soil, flora, and fauna -was turning to poison.

    This book constitutes an effort to help the student of today to understand what was happening then- and what was done to reverse the damaging processes. This book covers a number of the major concepts and programs affecting the air, the earth, the water. It goes back as far as the 1970s - using the actual words and drawings of tinkerers of that time- to show the magnitude of the problems confronting the people of the earth and how they began to work towards solutions.

    The viable existence of the human race seems assured in the twenty-first century. This book has been produced as a reminder of how narrowly that victory has won, and how close the earth came to disaster.

Saturday, May 27, 2023

Making Go Bags and Prep Kits for Everything.

 Go Bags and Preparedness Kits for Everything


This is meant to be a checklist for people making go bags. And other useful kits for extreme situations. This isn’t going to be perfect, but it should provide a good starting location for most people. 


Link to Google Doc.


Emergency Kit

This is meant to be a small bag that can easily be thrown under a car seat, or clipped onto a backpack to make a good survival kit or go bag. This item is excellent to give to people who don’t know anything about prepping as well. I am basing this heavily on an episode of live like the world is dying titled Margaret on Go Bags. So check that out if you want a better summary of this. Link Here and original poster’s name is Margaret Kiljoy.

An emergency kit should contain 3 ziplock bags one for hygiene, one for First aid and another for survival sundries. Everything on this list should be made to be lightweight first and foremost. Ideally this emergency kit would be able to fit in something as small as a lunchbox once complete.

Hygiene Bag

  • Small travel toothbrush.

  • Small travel toothpaste or toothpaste tablets.

  • Floss. (can also be used for sewing thread.

  • Compressed towel. Just add water(Douglas Adams would be proud these are a thing)

  • Tampon. Not for gunshot wounds, for its original purpose or possibly for firestarting

  • Earplugs. The small cheap ones.

  • Lip balm.

  • Condoms. If getting them for water and not for original purpose, get them unlubricated.

  • Lube packets.

  • Nail Clippers.

  • Hair Tie's.

  • Soap Strips.

  • Possibly some type of small cheap razor.

First Aid Bag 

  • Emergen-C Packets. They’re Vitamin C packets that make water into healthier Tang. Gives a boost as well as making water taste better to some.

  • Alcohol Wipes. For sterilizing wounds as well as possibly disease carrying objects.

  • Super Glue packets. I recommend the tiny ones at harbor freight you can get 10 for like 4 dollars. Some people have mixed opinions on supergluing wounds closed, but even if you have reservations they can be used for fixing things like boots and packs as well.

  • Antibacterial ointment. 

  • Band-Aids.

  • Wound Closure Strips/Butterfly Bandages.

  • Irrigation syringe, for much larger puncture wounds and cleaning them out.

  • Tweezers.

  • Gauze.

  • Petroleum jelly Packets.

  • Aspirin Pills. Pain relief,  Fever reducer, Anti Inflammation medicine. 

  • Advil / Ibuprofen Pills. Mild pain med, often used to help with arthritis. 

  • Tylenol / Acetaminophen Pills. A mild pain relief and fever reducer.Caffeine Pills

  • Benadryl / diphenhydramine. Anti Itching, anti anxiety, allergy aid, sleep aid.

  • Caffeine Pills/ Caffeine Gum. 

  • Potassium Iodide. Only if worried about nuclear war.

  • Any personal medications needed such as: personal pills, spare contacts/glasses, vitamins, ect.

Survival Kit

  • Kn 95 masks / P100 masks.

  • Butane lighter coated in duct tape. It helps protect the lighter and extra duct tape is useful.

  • Solid Fuel for Fire.

  • Kindling / tinder.

  • Box of Needles. Get both leather and regular needles.

  • Fishing Hooks.

  • Fishing line. Does not need to be a massive spool, may also double as thread for needle.

  • Water Purification tablets. Can also use a filter, remember this kit is meant to be small though.

  • Whistle

  • P51 / P31 can opener. Smallest can opener money can buy.

  • Emergency Blanket / Space Blanket.

  • Plier style multitool / Swiss army knife.


Other Good Stuff

Optional stuff to throw in here but still heavily recommended. If it isn’t included in an emergency kit, it should certainly consider being carried in a bugout bag/go bag.

  • Spork or other metal cutlery. Every military kit for the past 1000 years has included a spoon.

  • Compass 

  • Emergency Sleeping Bag. Warning it can be impossible to get back into the bag.

  • Small Paracord Bundle.

  • Magnesium Striker Block

  • Headlamp. Rechargeable by USB if possible.

  • External Phone Battery.

  • Phone charger. With multiple different cable plugs if possible, get a universal/octopus type.

  • Sunscreen.

  • Hand Sanitizer.

  • Wet Wipes.

  • Toilet Paper

  • Baby Powder. As a chafing reducer.

  • Hothands Packets. Any small instant heat packet.


Go bags

The Purpose of a go bag is meant to have more functionality over an emergency kit. It’s something that can easily be picked up and can be kept in a closet, by a door, or in a car’s trunk. Before finishing this kit I have to emphasize that it’s necessary to actually practice with a go bag properly, as this will let you know what parts of your kit actually work. I recommend going hiking with this bag for at least a few miles, throwing it on a bike, going camping and if possible, using every bit


  • The Bag itself, Get something bigger than a regular backpack with a fair amount of durability. Consider using molle attachments as well as this can make attaching the emergency kit to the go bag easy.

  • Steel Wall Canteen. Good over Plastic Nalgene bottles because water can be boiled in it. Recommending 32 oz or 1 liter.

  • Ready to Eat Food. Recommend things like protein bars, granola, trail mix, jerky, candy, ect. Things that are shelf stable, high in calories, can provide easy fuel to keep moving. At least 2000 calories of this.

  • Passport / copies of important documents.

  • Entertainment (Pack of Cards, books, gameboy, downloaded music/tv shows.)

  • Digital library, Keep a USB stick on the bugout bag with all the information you can put on it. It’s possible to download wikipedia, there’s tons of useful stuff on my other page here.

  • Collapsible plastic water canteen

  • Water Filter.

  • Paper Maps for Local Area.

  • Extra Method of starting fire

  • Durable Fixed Blade Knife. Find one that can split wood and be used for bushcraft. Bigger knives can be used for intimidation but are somewhat less useful for doing actual work with. Consider a knife 6 inches or less.

  • Small Knife Sharpening tool / Whetstone. Please practice with this before placing it in a go bag. As it takes some practice to get right.

  • Sleeping Bag. Use a small lightweight one rated to as low a temperature as possible. If concerned about weight or size, consider using a sleeping roll, blanket or beach towel. 

  • A Tent, a Tarp or a Bivi Bag. All have their uses and all have their downsides. Tents offer more protection but are also bulkier and take a decent amount of time to set up. Tarps are light, cheap and are great for making improvised shelter in the woods, but offer little protection. Bivi bags are an odd hybrid of both sleeping bags and small personal tents, some people swear by them, some people think they’re stupid.

  • Poncho or Raincoat

  • Extra Clothes. keep one change of clothes suitable to the local climate.

  • Socks (this is a must)

  • Underwear

  • Sturdy Pants, no holes.

  • Under Shirt

  • Gloves, even a cheap pair of gardening gloves are insanely useful.

  • Hat, either something warm or something to keep the sun out of your eyes.

  • Radio. Get at least one way communications with NOAA weather radio. I recommend the types that are crankable with solar panels that can also be used to charge a phone. If a ham radio operator, consider getting a small handheld two way radio. 

  • Binoculars. If money is available for this, consider thermal binoculars

  • Duct Tape

  • Cooking supplies. 


Optional Items. Things that are useful but not for everyone.

  • Machete. Useful for cutting down foliage and intimidation.

  • Hatchet. Useful for chopping wood and intimidation

  • Folding Saw. Useful for wooded areas and great for building shelters.

  • Collapsible Solar Lantern. 

  • Bear Spray. Can be more useful than a firearm. If you live in an area with bears, consider this.

  • Walking Stick

  • Folding Mini Shovel. A shovel is massively useful, I just wish they weren't so bulky.


Things to Add to a phone
.

We live in an age where many of the people who talk to and meet everyday have a high power computer in their pockets able to communicate in loads of different ways.

Accessories on other parts of this list that are useful to have.

  • Strong bulky phone case. 

  • Solar charger / backup battery.

  • Universal phone charger.

Things to download on a phone.

  • Offline Maps

  • Apps for communicating over wifi

  • Backups of important documents

  • Records of contact information for family and loved ones. 

  • PDF and Ebook reader apps.

  • File management system. For transferring and moving data.

  • Useful how-to books and guides. I have a whole link to useful stuff over here.

  • Translation software books or guides to common languages. Note that you can download specific languages on google translate.

  • Entertainment Books. I have a whole link to useful stuff over here.

  • Music. There’s tons of music free for public use out there. I know game osts and the internet archive are good places to start.

  • Games that work offline. To keep the mind occupied.

  • Mesh network communication apps. Apps like Bridgefy, and Briar. Are communication apps that do not rely on centralized servers, meaning that they’ll work without the need to communicate to a centralized server. So even if there’s no mobile data or wifi, some degree of communication is possible, even if it’s just to 300ft through bluetooth communications.


Guns and firearms. Only carry a firearm if you know what you’re doing.Can keep it secure at all times and know the relevant laws thoroughly.

  • 9mm handguns are by far the most common ammunition type and are small and easy to carry/conceal. 

  • If planning to spend an extended amount of time in the woods and survive there. Consider a small 22 rifle.

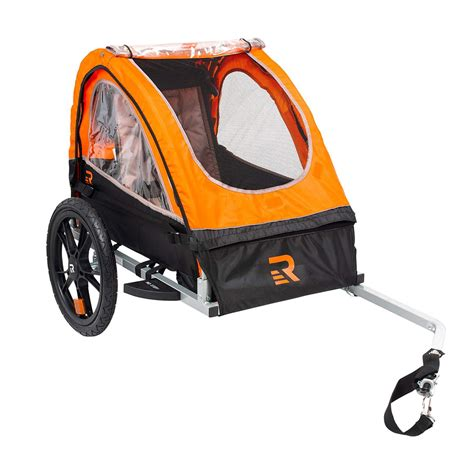
Building the 200 watt Solar Bike Trailer.

  The Solar Bike Trailer Link to the Big Google Doc: https://docs.google.com/document/d/11KIzcut1K6K_E2t0LbvgSbFuEbDXuiRDH8tEb8u1yUo/edit?us...